Focus and Sharpness

Soft pictures are rarely the lens's fault. These eleven tutorials cover autofocus modes and focus points on Nikon and Canon bodies, single-area and continuous focusing, back-button and AF-lock techniques, and the handling habits that keep images sharp: shutter speeds, stance, tripods and stabilisation. The set closes with a way to check and calibrate a lens's autofocus without buying a calibration tool.


Nikon D5500, D5300 and D5200 Focus Square Tutorial

Michael The Maven explains viewfinder focusing on the Nikon D5500, D5300 and D5200, split into how and where it focuses. He covers AF-S for still subjects, AF-C for movement and AF-A, noting the green confirmation dot, then the AF area modes, starting with a single square among 39 points.

Nikon AF Modes

Steve Perry shares his Nikon autofocus settings for wildlife action with back-button focus: 51 versus 11 selectable points, focus tracking with lock-on, and release versus focus priority in AF-C. He compares single-point AF for stationary subjects with dynamic 9, 21 and 51-point modes, which fall back to neighbouring sensors.

How to Control the Focus Points on a Nikon or Canon DSLR

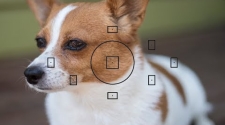
Paul from Photo Genius photographs dog Charlie behind toy balls in auto on a Nikon D3400, the camera picking different subjects. Switching to manual, he selects single-point autofocus via the i button and moves the point by multi-selector, then repeats on a Canon T6 with AF button and dial.

AF-S Single-Area Fully Explained

Andrew Boey demonstrates AF-S with single-point focus on model Minji for still subjects, showing two methods: moving the point to the nearest eye for rule-of-thirds framing, and faster focus-lock-and-recompose, half-pressing on the eye then panning without stepping forwards or back, unsuitable on tripods or at shallow depth of field.

Tack Sharp Photos Every Time: 4 Simple Tricks

Four ways to avoid blurred photographs from Photography Pro: cradle the lens in the left palm with elbows tucked in, or brace on a railing; lock focus with single-shot autofocus and half-press before recomposing; raise ISO, comparing 200 with 1600 handheld; and pick a higher f-stop for front-to-back sharpness.

How to Take Sharper Photos with a Digital Camera

Paul from Photo Genius offers five tips for sharper photos, blaming most blur on focusing or camera shake. He demonstrates holding the camera to the eye rather than at arm's length, standing feet apart, leaning on walls, using a compact Manfrotto Pixi tripod, and switching stabilisation off once mounted.

How to Calibrate Lens Autofocus Without Buying a Tool

Karl Taylor calibrates a drifting lens with a whiteboard, ruler and tripod. He draws a line, focuses the central point on it at f/1.2 after manual defocus, lays rulers at 20 centimetres and shoots; when 21 and 22 look sharper, he dials minus 15 in AF micro-adjustment and reshoots.

Focus Like a Pro: Camera Tips for Beginners

Paul from Photo Genius offers focusing tips for Canon and Nikon beginners after a Canon T7 auto shot misfocused. He leaves auto for M or Av, always puts the focus point on the subject, and switches from One Shot or AF-S to AI Servo or AF-C for moving subjects.

How to Use the AE-L/AF-L Button on Your Camera to Take Better Photos

Paul from Photo Genius explains the AEL button, a star on Canons, which locks exposure and sometimes doubles as AF-L. In aperture priority at ISO 200 and f/8 the shutter speed shifts as he pans, until he presses the lock and recomposes with exposure held, useful for off-centre subjects.

How to Get Sharp Photos with Any Camera

Simon d'Entremont runs through his sharpness checklist for wildlife: shoot in directional light creating micro-contrast on feathers, not flat overcast, keep ISO low, use enough shutter speed for subject and hand movement, avoid heat shimmer and warm car windows, and close the aperture one stop, testing on taped-up newspaper.